Make Your Own Floating Shelves
Make Your Own Floating Shelves. Each floating shelf supports cleat must be straight as an arrow. Then determine the depth of the shelf we went with 8. Install your 2 2 bracing at the correct height. Next grab the 4 x 4 sheet of plywood with 1 4 thickness cut it into 9 25 strips to make shelves.
Use your circular saw and the same cutting guide you used to cut the plywood pieces to width set another 2 4 under the guide to keep it from tipping.

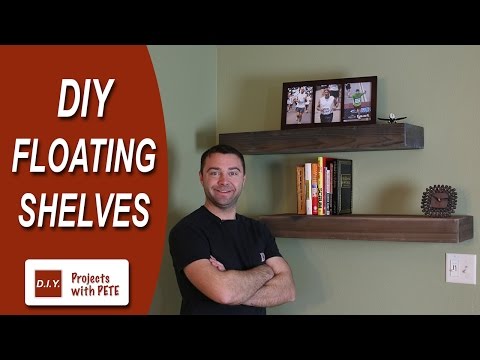
Make your own floating shelves. Build your own floating shelves to make these easy floating shelves you need 1 length of 1 x 10 x 8 pine or whiteboard 2 lengths of 2 x 3 x 8 and 3 lengths of 1 x 4 x 6 pine or whiteboard. For each shelf you will need four. See below for more information on this.
Measure the width of the wall behind the floating shelves take this measurement and subtract 1 4 this will allow 1 8 of gap between the shelf and wall on each side. Using a wrench install one lag screw into each stud until it s tight. The rest of the dowel will need to be sanded down.
Build a 2 2 rectangular frame using these measurements. It will make for a tight fit. Hold the cleat to your line on the wall and drill into the stud with a 1 8 in.
Easy diy floating shelves you can make in minutes start to finish. If you re applying stain be sure to wipe off excess stain and let each coat dry until you reach your desired finish. The trick to making this step successful is to sand down a portion of the dowel.
Make a wall cleat. Then determine the depth of the shelf we went with 8. A part of the dowel will pass through the back bracket of the shelf.
If you wanted your stained shelves to be glossy cover with a coat of polyurethane lacquer. This part can be left unsanded. To make floating shelves start by cutting a piece of wood into three pieces so that the first piece is as long as your shelf panel which is the flat piece of wood that forms the bottom of the shelf and the other 2 pieces are the same width as the shelf.
Let all pieces dry completely. Wall shelves floating shelves standing shelves you have a lot to choose from the below given diy shelves ideas with a wide range of styles designs and shapes. Rip the cleat to width and then crosscut it to length.
2 once you ve gathered all of your supplies start by cutting your supporting timber pieces to length. Each floating shelf supports cleat must be straight as an arrow. Get creative and use reclaimed wood or make pallet floating shelves for a weathered look.
The cleat acts as a floating shelf mount. Showing the decor pieces in living hall entrance or the bedroom on the floating or wall mounted shelves would add a spark to the home embellishment. For each shelf you will need 2x support timber the length of the shelf 2x support timber the width of the shelf 1x extra piece the length of the shelf if you are adding an additional support like we did 1x piece of mdf for the top of shelf 1x piece of mdf for the bottom of the shelf and finally 1x last piece of mdf for the front of your shelf.
Cut a wall cleat h out of a straight 2 4 and make it 1 1 2 in.
 Floating Shelves Diy How To Make Your Own Floating Shelves Floating Shelves Diy Floating Shelves Living Room Floating Shelves
  Diy Floating Shelves The Home Depot Floating Shelves Diy Modern Floating Shelves Bookshelves Diy
  44 Impressive Diy Shelves For Storage Style Thrillbites Diy Dining Room Diy Dining Diy Shelves Easy
  How To Build Simple Floating Shelves For Any Room In The House Floating Shelves Floating Shelves Diy Shelves
  Adding Built Ins White Floating Shelves Around A Window Niche Young House Love White Floating Shelves Wood Floating Shelves Floating Shelves
  Make Your Own Floating Shelves Diy Creators Youtube Recessed Lighting Bookshelf Lighting Shelf Lighting
  Floating Shelves Diy How To Make Your Own Floating Shelves Floating Shelves Diy Floating Shelves Wood Floating Shelves
  Diy Wood Floating Shelf Etagere Bois Flotte Deco Maison Idee De Decoration
  How To Build Your Own Floating Shelves Paint These Suckers Glossy White And It Will Fit With My Beautif Wall Bookshelves Floating Shelves Diy Floating Shelves
  19 Diy Floating Shelves Ideas Best Of Diy Ideas Floating Shelves Living Room Floating Shelves Diy Floating Shelves Bathroom
  Make Your Own Floating Shelves With This Simple Technique 8 Steps With Pictures Floating Shelves Diy Floating Shelves How To Make Floating Shelves
  Make Floating Shelves With Invisible Mounting Technique Youtube Floating Shelves Diy Floating Shelves How To Make Floating Shelves
  Diy Floating Shelves Plans And Tutorial Floating Shelves Diy Floating Shelf Plans Home Diy Build Your Own Floating Shelf Floating Wall Shelves You Have To Try Using In Your Home Minimalist Floating Shelves Shelves Floating Shelves Diy
  Pin On Woodworking Ideas
  Diy Faux Floating Shelves Mommy Suite Floating Shelves Diy Floating Shelves Diy Bathroom
  22 Easy Diy Schwimmregale Herkes Soruyo Floating Shelves Diy Diy Shelves Diy Shelves Easy
  Fixer Upper Look 14 Diys To Get The Look Page 2 Of 3 The Weathered Fox Floating Shelves Diy Home Diy Shelves
  Diy Floating Shelves For Easy Storage Floating Shelves Diy Wood Floating Shelves Wood Shelves
  Float On Wood Floating Shelves Floating Shelves Diy Diy Wood Shelves
 This page has many articles about make your own floating shelves. How to Build Shorter Shelves. Build shorter shelves by cutting the shelf to length. Glue a filler block flush with the end and nail each side with small brad nails. Required Tools for this Project. Have the necessary tools for this DIY floating shelves project lined up before you start—you'll save time and frustration. Circular saw; Glue; Hammer; Level. Want to impress the super handy person in your life? This floating shelf only looks hard once it's complete, but the secret is the sturdy hardware that can transform almost any piece of wood into a shelf. You do need some power tool experience, since you'll need to create holes to fit the hardware into using a drill bit. We recommend this hardware if you need to hang more than one shelf too; it's a very affordable option where you can get a pack of six for a little over $20.. Build Your Own Floating Shelves To make these easy floating shelves, you need 1 length of 1″ x 10″ x 8′ pine or whiteboard, 2 lengths of 2″ x 3″ x 8′ and 3 lengths of 1″ x 4″ x 6′ pine or whiteboard. Next, grab the 4′ x 4′ sheet of plywood with 1/4″ thickness, cut it into 9.25″ strips to make shelves.. Floating shelves can enhance any area. For less than $10 you could make 3 all of these. The beauty of this is you can make them with no hardware. Shelf Dimen.... To make floating shelves, start by cutting a piece of wood into three pieces, so that the first piece is as long as your shelf panel, which is the flat piece of wood that forms the bottom of the shelf, and the other 2 pieces are the same width as the shelf..
Videos of make your own floating shelves:


Duration: 08:20. Views: 20000+


Post a Comment for "Make Your Own Floating Shelves"